Is your HP printer not printing? Start by checking basic things like paper and ink/toner levels and ensuring the printer is securely connected to the computer or network.
HP printers are essential tools for individuals and companies. They offer easy printing, copying, and scanning. Printers allow you to print important documents, make copies, and scan documents quickly and easily.
HP printers are great for various reasons, but they tend to have issues after long-term use. Some of the most common problems are ink problems, paper jams, print quality issues, and loss of connection.
Common Issues: HP Printer Not Printing
A common reason for your printer not printing could be due to many factors:
- Hardware Issues: Paper jams, low ink toner, printhead clogs, misaligned text/images, outdated or corrupted printer drivers, faulty cables and connections, printer offline issue, printer not recognized.
- Software issues: Print queue Issues, firewall or antivirus blocking, printer settings, printer firmware, incorrect paper type, printer error codes.
- Network issues: Router issues and low Wi-Fi signals can also be the reason.
Why Is Your HP Printer Not Printing: 6 Best Solutions
Certain issues are bound to occur after extensive use and the printing of hundreds of copies. While basic troubleshooting easily resolves most of the problems, some may require expert assistance.
Let's take a look at the most common printer error problems and solutions to fix them.
Solution 1: Fix Paper Jams
Paper jams are considered one of the most common HP printer problems. They're typically easy to fix and are often caused by an overfull paper tray, misaligned paper, using the wrong type of paper, or even dust and debris inside the printer. Over time, the rollers can wear out and become slick, making it difficult for the printer to pick up paper.
This can be fixed easily with the help of the steps given below:
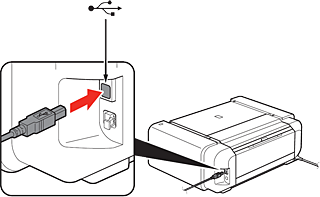
- Turn off the printer and unplug it.
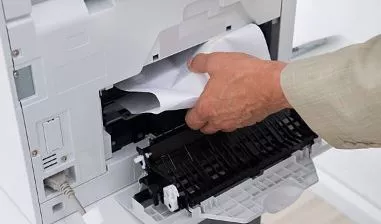
- Open the printer's access panels (front, rear, or top) to locate the jammed paper.
- Gently remove the jammed paper, avoiding tearing or leaving behind pieces.
- Make sure to remove any small pieces of paper that might be stuck inside your printer.
- Use a clean, dry cloth or a brush to clean the paper feed rollers.
- Reload the paper tray while ensuring that the paper is properly aligned.
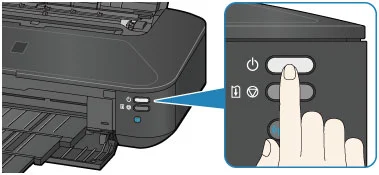
- Turn on the printer and try printing again.
If these steps do not work and you still have a jam or blockage error message, consider seeking help from a professional.
Solution 2: Check Ink or Toner
If your printer isn't printing due to ink or toner issues, check ink/toner levels, ensure cartridges are properly installed, and try cleaning the printhead or cartridge contacts.
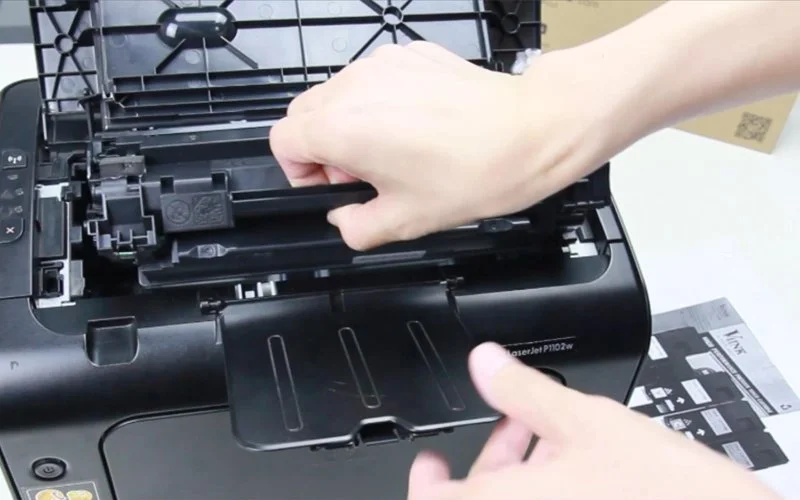
- Open the printer and visually check the ink/toner cartridges to see if they are low or empty.
- Check the ink/toner levels using the printer's software or control panel.
- Replace the cartridges with new ones if the levels are low or empty.
- Make sure the cartridges are correctly seated and that any protective strips have been removed from the new cartridges.
- If automatic cleaning doesn't work, try cleaning the printhead manually with a soft, lint-free cloth and distilled water.
Solution 3: Check Connectivity
This is one of the major issues that is overlooked when printers do not print. Connectivity issues, such as loose cables, incorrect Wi-Fi settings, or outdated drivers, prevent printers from receiving print jobs, resulting in no printing.
Connectivity issues can cause printers to stop printing due to loose cables, incorrect Wi-Fi settings, or outdated drivers.
- Loose or damaged USB cables or Ethernet cables can disturb communication between the printer and the computer.
- If the printer is connected to a different Wi-Fi network than the computer, it cannot receive print jobs.
- A malfunctioning router or network problems can cause no printing.
Steps to resolve the connectivity issues:
- You can perform a hard reset by unplugging the printer and router from the power outlet, waiting for 30 seconds, and plugging them back in.
- Ensure all cables (USB or Ethernet) are correctly plugged into both the printer and the computer.
- Check if both the printer and the computer are connected to the same Wi-Fi network.
Solution 4: Update Printer Drivers
To fix outdated printer drivers causing printing problems, update or reinstall the drivers by visiting the printer manufacturer's website.
- Restart your printer and computer, then check Windows Update for optional or driver updates.
- Visit the official HP website and download the latest printer drivers for your printer model.
- If the issue persists, uninstall the printer driver and then reinstall it.
- In Device Manager, find your printer, right-click, and select "Uninstall device."
Solution 5: Clear Print Queue
When your HP printer not printing, check and clear the Printer Queue with the help of the following steps:
- First, right-click on the Start menu and then select "Settings."

- Go to "Bluetooth & devices" and then "Printers & Scanners."

- Choose the printer you're having trouble with from the list.
- Select "Open print queue."
- The print queue window displays a list of pending print jobs waiting to be printed.
- If you see print jobs that are stuck, you can right-click on them and select "Cancel."
Clear the Queue: If all jobs are stuck and you can't cancel them, you should clear the print queue.
- Press the Windows key + R key, type services.msc, and then press Enter.

- Locate and find "Print Spooler" within the list after scrolling down.
- Right-click on "Print Spooler" and select "Stop."
- Open File Explorer and go to the Spool Directory.
- Delete all files within the PRINTERS folder to clear the print queue.
After a few seconds, right-click on the "Print Spooler" and select "Start."
Solution 6: Print Status Report
You can typically access it either via the printer's control panel or through the printer's software app on your computer.
Through the printer's control panel:
- In the printer's control panel, look for buttons or options labeled "Information," "Reports," or "System."
- Choose the option to print a status report and then press OK.
Through the printer's software or app
- Open the printer's software or app on your computer.
- Go to the printer's properties or printing preferences.
- Look for a "Maintenance" tab or a section related to reports or status.
- Select the option to print a status report or view printer status.
- The printer will then print a page containing the status information.
Advanced Troubleshooting Tips
If you're still unable to print from your printer, try these troubleshooting steps:
- Make sure your printer is set as the default printer in your computer's settings.
- Disable your firewall or security software temporarily to see if it's blocking communication.
- Run the printer troubleshooter.
- You can use the printer's manual for specific instructions on printing status reports and troubleshooting.
- If the problem persists, contact HP Support or the printer manufacturer's support for further assistance.